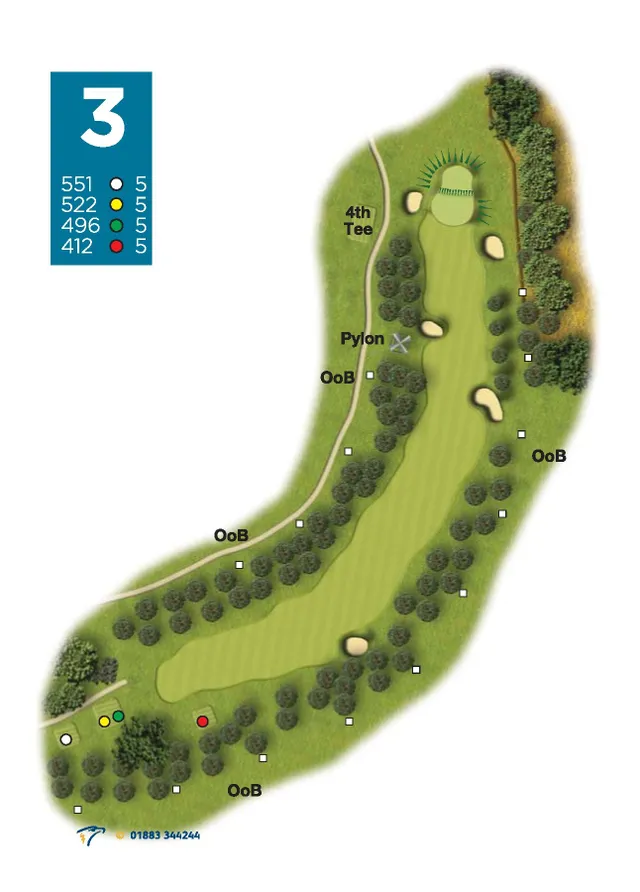
A tough driving hole with O.O.B. left and right. A second shot ideally needs to be placed on the plateau approach avoiding the bunker left and steep slope to the right. The pitch shot remaining needs care with a big two tier green, distance control essential.
We are ideally situated close to the Norfolk showground. We are directly off the A47 Norwich Southern bypass. Take the Norfolk Showground/Bawburgh exit. Find us on Google Maps.